Wednesday, October 2, 2013

Sorting out problems on a Windows PC using a Live CD

Carrying a Live CD with you can come in very handy if you help Windows users. I have often been able to help people backup their crashed Windows PC using a Live CD and an external hard drive or iPod. But surely there is more that you can do than simply copy files over? Let us take a look at a few options now.

(A Live CD allows you to boot into Linux, in this case Peppermint, without having to install it on the PC. Take out the CD and reboot and you have Windows back. Easy as pie, and it is usually not risky either.)

1. Recover a lost Windows password


Your friend / relative has forgotten their Windows password. No need to get excited, boot from your Live CD. Now we need to install a program, so connect to the Internet then open Software Manager.

Search for chntpw and install it.


2. Virus scan a Windows PC

Your friend / relative has a PC that has been crippled by viruses and you can't fix it from within Windows. Boot from your Live CD, then connect to the Internet. Now you need to decide which anti virus to use.

2.1 ClamAV
The best known free anti virus on Linux. Open a Terminal Window and type:

  • sudo apt-get install clamav clamav-daemon clamav-freshclam clamtk
  • press <ENTER>
  • follow the prompts
To run, click Menu, run then type clamtk then press <ENTER>


2.2 Kaspersky
Go here and download the .deb version, follow the guidelines on the website.

2.3 Avast!
It looks like Avast! used to have a Linux version, but I can't find it now.

2.4 AVG
Go to this page, then click on ACG Anti Virus Free for Linux, click on the .deb version. You should be able to install it by double clicking the downloaded file.

3. Test hardware

If you doubt the condition of your CPU try CPU Burn-in, for RAM issues try MemTest86+ (there is usually an option to boot into this when booting from the Live CD) and gsmartcontrol (install it in Software Manager) can check the health of your hard drives. Peppermint comes with a tool called Disks (click Menu, Preferences, Disks) which also has SMART data and Tests that you can run.


Did I miss something? Mention it in the comments please.

Sunday, September 29, 2013

Recovering data Part 2: deleted partitions

While PhotoRec will recover lost files, what happens when an entire disk partition vanishes? Enter TestDisk.

The ideal situation will be that after you realized you wrongly deleted that partition, that you boot up with a Live CD or Flash Drive. Connect to the Internet, then open Software Manager and search for TestDisk (remember to include the Universe repository in the settings).

When you recover data it is always better to recover it to a different drive, the ideal would be a large external HDD.

For an in depth look at TestDisk check out the HowToGeek tutorial here. At the moment I don't have a test machine and I am sadly not going to risk deleting an important partition on my laptop for this tutorial.

Sorry folks, maybe some day I will revisit this when I have a test machine and an empty external HDD.


Thank you for understanding.

Friday, September 27, 2013

Recovering Data Part 1 - deleted files

Have you ever deleted a file, only to realize that you in fact, still needed it? That's what the Trash Can is there for (Recycle Bin for Windows users). But what if you emptied the trash and then realized you still needed stuff?

Recovering deleted files can save you a lot of time and effort, in that you do not have to redo the work you spent hours or days doing and in some cases like with holiday photographs it can help you save precious memories. You can't go on holiday to the exact same place and retake all the photos you lost (normally).

Enter PhotoRec, it comes bundled together with TestDisk (which we will discuss in a later post). To install:
  • Open a Terminal Window
  • Type in: sudo apt-get install testdisk
  • Press <ENTER>
  • Type in your sudo password and press <ENTER>
  • Follow the prompts
(Alternatively search for testdisk in software manager)
(remember to include the Universe repository in the settings, if you get an error message when you try to install the program)

If you are not in a Terminal window, then open one. Type in sudo photorec and press <ENTER>. You might not have to enter your password again, unless if more than a few minutes has passed since you last typed it in.

PhotoRec will now ask you on which partition you want it to search for deleted files. I deleted a few files from a flash drive before installing the program and here I choose my Adata flash drive. Next you will need to choose what type of partition it is for PhotoRec to be effective. Now you are asked to choose the partition to scan for deleted files, do so.

  If you are asked which file types to recover, then make a selection (I must have chosen all files somewhere).

You will now be asked where to save the recovered files. I choose my home folder, PhotoRec make a sub folder with all the recovered files in it.

The only thing that was strange (to me at least) is that the recovered files where:

1. Not in folders, as they had been on the drive and
2. Had all been renamed, of the 238 recovered files all of them started with f

I tested some of the recovered files and found that they had successfully been recovered (unlike my experience with some Windows file recovery programs where you are told that your files are now back, but they don't open properly any more).

A program worth checking out.

Wednesday, September 25, 2013

Sorry I have been so quiet lately

I started a new job in August, which keeps me away from home for 13 hours a day. I now have a lot less spare time and it has cut into my blogging time as well.

I really should try to put up a new post every week, fingers crossed.

Saturday, July 27, 2013

Ubuntu for phones, thoughts and opinions

I've been thinking about this since I listened to a podcast today (FLOSS episode 252 where Jono Bacon talks about Ubuntu for mobile phones).

When Android first came out, it was strange and new. Being in South Africa we have excessively high mobile data charges and people were getting slammed by the mobile phone operators for high data usage. At that point the HTC Dream phone was the only phone running Android, I worked as a Customer Service Agent at a mobile phone store selling contract phones. A friend bought one of these phones and managed to install something that totally bricked his phone, he sent it in for repairs and ended up waiting almost 6 months for HTC to send it back. I was NOT going to recommend this phone or the Android brand to clients.

Fast forward 2 years, Samsung had launched plenty of phones running Android (Gingerbread the then current flavour) and the platform had matured a bit. I started to get to know how it works and how to stay out of trouble. Fast forward to today and there are many communities that will help you get the right software tools, advice and ROMs needed to customize your phone. 

Why is this relevant? Because we are at the point of Ubuntu phone being launched. It's still a work in progress, but if you listen to FLOSS #252 you will see the passion that these people have for the new platform. Ubuntu One will play a crucial role in everything as you can sync your files across phones and computers, buy and stream music and sync your contacts to it (among other things). 

When comparing Ubuntu One to its greatest competitor, Dropbox, you will notice that Dropbox is more polished. Dropbox probably has more money invested in its service than Ubuntu One though. 

It's not really fair to evaluate a new platform that's still being built. I mean, the first iPhone could not send MMS messages and iOS 7 has now only caught up with Android as to having live wallpapers. But Android wasn't perfect either when it launched, it's going to take Ubuntu a while to catch up to the competition, and they aren't the only one's trying to get a slice of the action. Nokia and Blackberry and trying desperately to make their platforms a success again, while Firefox OS has beaten Ubuntu phones to market (who knows if they will become a mayor player?). 

The future is uncertain, but I wish the Ubuntu phone team every success with their endeavour. I'm not a fan of using Unity on the desktop and I may not like how their phone OS turn out. They have a lot of hard work ahead of them. Google (with Android) proved that it is possible to come out of nowhere with a new phone OS and become a dominant player within 4 years of launching it, so anything is possible.

So I got tired of double clicking

Computer mice have been around for a while now, I have used a lot of different ones in my time. This morning I started thinking about double clicking again. I've been double clicking, because that is the Windows default way of doing things (single click to select) - but I don't have to. So I enabled single click on Peppermint.

Here's how to do it:

  • Open PCManFM
  • Click on Edit
  • Click Preferences
  • Click on Open files with a single click

These instructions are specific to LXDE, which uses PCManFM as it's default file manager.


Other desktop interfaces:

To do this in KDE: (if it's not the default)

  • Click "Start"
  • Go to System Settings
  • Open Keyboard and Mouse
  • Click the Double click to open files and folders radio button
  • Confirm if you have to, or close the window


To do this in Gnome 2:

  • Open your file browser (Nautilus)
  • Click on Edit
  • Click on Preferences
  • Click the Behaviour tab
  • Click the radio button for Single click to activate items
  • Click Close


To do this in Gnome 3:

  • Open your file browser
  • Click on File (top left)
  • Click Preferences
  • Go to the Behaviour tab 
  • Click Enable single click
  • Click Close


To do this in Unity:

I found a tutorial on this, click here to check it out.

Friday, July 26, 2013

I meet an old friend! PDFTK

I have used PDFTK in Windows as a portable app (thanks Portable Apps!) and today I needed to combine a few PDF's again. A quick Google search got me onto PDF Shuffler, which in my experience, does not work on Peppermint 4 (or Ubuntu according to an article I read).

My next option was PDF Chain, a GUI for PDFTK (which I really love). This program has helped me combine hundreds of PDF's into 1 file, place watermarks onto PDF's and split and recombine PDF files. It is an amazing piece of software and every printing shop needs to have this (I used to work in a printing shop and this came in real handy at times).

It can join (concatenate), split, stamp and even rotate PDF files.

Let's install PDF Chain:

  • Open a Terminal (Click Menu >> Accessories >> Terminal)
  • Type in sudo apt-get install pdfchain , press <ENTER>
  • Type your password, and press <ENTER>
  • Confirm the install

It is now installed in the Office section of your Menu.

Enjoy

Monday, July 22, 2013

2 Android apps to try

I don't regularly review Android apps here, but these 2 I have to mention.


To me this is the most useful app for Android. Being reminded every few minutes that I missed a call or SMS is very important (to me at least). Last Friday I spoke to someone who was also needing something like this and I was overjoyed to have found this app.

Going to be recommending this app to everyone I know who has an Android phone.

It's a free app.


I don't know many people who feel as strongly as I do about podcasts, but if you do - you will probably love this app.

You can download via WiFi only, and set podcast subscriptions to download automatically when using Wifi - which is great. I like the subscription tool, which can add rss links, search for a theme or podcast name or subscribe to one of the featured podcasts. Easy to use and very useful.

There is a free version and a donate version. Install the free version first. The free version is not limited, it does have adds though. Consider donating to the project if you like it, as it is cheap and very useful.


Found a great Android app recently? share it is the comments below.

Wednesday, July 17, 2013

Do you miss the classic Windows look?

I was browsing though www.gnome-look.org and came accross the Classic 95 theme.

If you install it, your Linux looks like Windows 95 (which is good for a laugh and you can easily undo it).

Here is how to do it:


  • Head over to this page
  • Click download, to download the file (Classic95-0.8p1.tar.gz)
  • Click for the slower (free) connection
  • Wait 14 seconds for timer to run out
  • Click the green download button again
  • Click on Menu -> Preferences -> Customize Look and Feel
  • Click the Icon theme tab
  • Click Install (bottom left)
  • Navigate to your Downloads folder and double click the Classic95 file
  • The program closes (which might not happen to you, if it does not close skip the next step)
  • Click on Menu -> Preferences -> Customize Look and Feel -> Icon theme tab
  • Click on Classic 95 in the list
  • Click Apply


Enjoy the nostalgia that was Windows 95, where dialup modems were cool and folders were yellow.

Tuesday, July 16, 2013

Don't hate on Ubuntu

I love listening to podcasts, one that I recently started listening to is called "Linux for the rest of us". It is hosted by Stephen McLaughlin (the Door to Door Geek) and Cody Cooper (Super Coop). In Episode 137 Stephen had a soap box moment where he told people not to hate on Ubuntu, especially if you are using Mint, Peppermint or any other distro that has Ubuntu somewhere in it's roots.

I think he has a point, I myself use Peppermint 4 because it runs well on older hardware and I like the LXDE interface. I specifically don't use Ubuntu because of Unity, I might not like everything that Ubuntu is doing or the direction they as a company have taken - but I use a distro that's had a strong influence from Lubuntu and Mint, which ultimately have Ubuntu as their ancestor.

We should not bash one distro (you don't have to wear an Ubuntu tshirt 24/7), but you don't have to hate on it because it uses a desktop interface that may or may not be your first choice. The Ubuntu team have put a lot of "elbow grease" (as Stephen calls it) into Debian to make it easier to use, and it is very hypocritical to hate Ubuntu and rave about how Mint is the best Linux ever.

I hope I have made some sense today; if not then I need help, or a cookie, or both.
You can respect what Ubuntu has done - while using another distro.

Friday, July 12, 2013

Raspberry Pi week ends

Here are some things that I noticed while using the Raspberry Pi, that might make your life easier:

  • If you are using RC leads, get a set that has a 3.5mm audio plug on the one side and a Red / White plug on the other. This way you can use the audio in the TV, instead of connecting it to speakers.
  • Get a powered USB hub. 2 USB ports is not enough (for me). Put the 4 port hub underneath the Raspberry Pi and use it to power it (if you have a nice, short Micro USB cable). Having a powered HUB means that I could use my USB hard drive (that has only a USB cable for data and power) with it. I had to use my brother's HDD, which has a USB cable and a power adaptor. Having extra USB ports means that you can connect a WIFI dongle, etc. as well.
  • Get a fast SD card. Running an operating system off a Class 4 card is very slow. Get at least a Class 10 (or higher) card. 
  • Get at least a 4 GB SD card. Although you also get smaller Linux distro's for the Raspberry Pi, having a 4 GB or larger card gives you more options.
  • Get a few SD cards. Having a few cards, means that you can load one card with Pidora, another with OpenELEC and a third with Rasbian. It's no fun having to reload the same card over and over. This is one of the greatest things about the Raspberry Pi, it can go from one use to another in under a minute. 


These are just a few things that I discovered in my short time with the Raspberry Pi. Feel free to share your experience and tips in the comments.

NOOBS for the Raspberry Pi

When the Raspberry Pi first came out, there was only the long (complicated) way of loading software onto it. This proved difficult for some younger and less Linux experienced users. Enter the (sometimes controversial) NOOBS or New Out Of Box Software available from http://www.raspberrypi.org/downloads

It's controversial because some users feel that it's now "too easy" to load up your SD card; while others feel it's great for first timers and are all for it. Regardless what you feel about it there are people who appreciate it.

How to use NOOBS:


  • download a 1.1 GB zip file from here
  • formatting your SD card with this tool
  • check that the SHA-1 checksum of the download is: bdb61930b077dcefd22b36caaa9698bdf76b290d
  • (if you don't know how to, click here)
  • Unmount the SD card (open File Manager / PCManFM (LXDE distros), click the eject button next to your SD card) 
  • put it in your Raspberry Pi and boot into the graphical user interface
  • follow the prompts
Have you used NOOBS? Are you for or against it? Leave a comment and share your opinion with the world.

Monday, July 8, 2013

OpenELEC and the Raspberry Pi

So while on holiday in Jeffreys Bay, a friend offered to borrow me her Raspberry Pi. I was overjoyed, though this was a working holiday - I did find the time to install OpenELEC on it.

The Raspberry Pi is the size of a credit card, it was created with the goal to promote computer programming among school children. Although a lot of users are older than that. It's not a super powerful computer, but that was not the purpose. The Pi can and has been used for several different uses: from robotics, to running a PABX system, to running a home security system and home automation or a media center.

The Raspberry Pi uses a SD card instead of a hard drive, so if you have multiple SD cards you can install a different operating system on each and swap them as needed.

I had an 8 GB SD card, but left my ADSL connection at home. On holiday I have a 3G connection, which here in South Africa is very expensive to download large amounts of data on. I was now searching for a small operating system to load onto my SD card. Rasbian and Pidora where too large for my budget, so I kept looking. I settled on OpenELEC, which transforms your Pi into a media center for watching videos, listening to music and looking at photos.

 Then I loaded a 100 MB bundle on my Samsung Galaxy Pocket (cost me $3) and downloaded OpenELEC. Downloaded OpenELEC from here. Now my problems started. The downloaded file had no extension, and even though I renamed it to have the .tar.bz2 extension - the file could not extract :(

My friend was kind enough to let me use her Internet connection to download it and this time there the file worked, yay! Now I need to install it. So I went to their wiki. Ok, now I had another problem. I often remind people about my limited knowledge about Linux and how little things can still stump me.

Extract the archive:

  • Go to your downloads folder
  • Right click the file
  • Left click on Extract here


  • Then open a Terminal window and navigate to that folder:


  • cd /home/batman/Downloads/OpenELEC-Rpi.arm-3.0.6

(substitute batman with your username, also remember that Linux is case sensitive, so you need to type it exactly right or you will get an error message).

  • Next insert your SD card and type in: dmesg | tail and press <ENTER>

This will tell you what the drive name of your card is, mine is sdb1 (be careful in the following steps, if you enter the wrong drive details you may wipe your hard drive. Don't type a number for the drive, just the name: sdb instead of sdb1 - otherwise you will also have an error message stare you down).

  • Next type sudo ./create_sdcard /dev/sdb and press <ENTER>

This will install OpenELEC to your card. Eject the card (open your file manager (PCManFM in my case) click the eject button next to your drive name).

You can now insert the SD card into your Raspberry Pi, connect it to a monitor using RC or HDMI, connect speakers and a keyboard and you are good to go. Connect a flash drive or USB hard drive to it and you can watch or listen to your media in the living room or bedroom.

To recap: Requirements

* A Raspberry Pi
* A SD card (the higher the class, the faster the drive. Try to use at least a class 10 card)
* An Internet connection
* An HDMI monitor & cable or RC cable and capable TV
* Speakers
* USB keyboard

My impressions of OpenELEC:

I found it easy to use and very capable. The interface is easy to navigate. OpenELEC also supports adding a remote, instead of depending on your trusty USB keyboard.

Video and audio playback was smooth and I found using OpenELEC to be pleasurable experience. I would definitely recommend that you try this if you have  a Raspberry Pi.

Wednesday, July 3, 2013

Raspberry Pi week kicks off - First impressions

While you can read an entire manual on the subject, I would like to share my experience with you.

The first time I held a Raspberry Pi (more or less August 2012), I was amazed by how something so small could do so much. In South Africa, there's a long waiting period from most suppliers when you order. A friend of mine, who owns a computer shop ordered a few for clients - and he ended up waiting months to get them.

I've never agreed with the press that the Raspberry Pi received regarding the price: it's not a $35.00 computer. When you factor in a class 10 SD card, a USB mouse & keyboard, a micro USB size charger (all of which that you may be able to pilfer from your computer supplies). Getting a HDMI monitor or a TV adds a lot of money to your startup costs. If you have a TV or HDMI monitor then it's not a problem. At the moment, I own neither.

The first day I saw a Raspberry Pi in real life, I ordered one; then cancelled my order later that day. It seemed like a great thing to buy, but I had no idea what to do with it (at that time I was running Peppermint 3 on a EEEPC 704G, and it has a screen, keyboard, etc. and was easier to use than setting up a new machine). I've seen a KindleBerry Pi and many other strange things that people have used their Raspberry Pi's for - but what would I use it for?

This article seems a bit negative, sorry for that.
My first impressions may not have been overwhelmingly positive, but I really did enjoy having the opportunity to try out a new gadget last week. Next time, I share day 1 with the Raspberry Pi.

Tuesday, July 2, 2013

A quick filler post - Downloading websites

Perhaps you need to download a website for offline use because you are going somewhere with no Internet connection, or perhaps like me, you just like to be thorough.

When you find a website with a user manual (that's not in a PDF that you can easily download), you may want to download the entire guide, just in case; or to look through even when you are not near an Internet connection.

If you were using Windows, you could install httrack (which I have used in the past and which worked great), but I want to use Linux as my primary OS so I wanted to be able to do it here. Enter wget, a great way to download websites.

If you don't have it installed, open a Terminal window and type in:
sudo apt-get install wget
enter your sudo password, press <ENTER>

Decide on a website to download, then navigate to where you want to download it to (it should be)

cd Downloads <ENTER>
mkdir test <ENTER> (I'm using test, you can call it something else)
cd test <ENTER>

To download the website to your test folder located in Downloads:

wget -r http://test.com (replace test.com with the website you want to download)
the -r will make it download the entire website, if you leave out the -r you can download a single page, for example:

wget http://www.linux.com/news/embedded-mobile/mobile-linux/726708-smartphone-war-all-about-brics-emerging-markets
will download only that page (tip: copy the url from your web browser, then in the Terminal, type wget
then right click next to it, then left click on paste. Now you didn't have to type out the entire url).

Just please don't type:
wget -r www.google.com <ENTER>
This will download the entire Internet onto your computer! You have been warned!

I hope this helps someone :)

Monday, July 1, 2013

Raspberry Pi week coming soon!

I've been on a working holiday in Jeffreys Bay this last week and a friend borrowed me her Raspberry Pi.

I was very excited, and have started working on a few articles to highlight my experience with the Pi.

Tomorrow I'm travelling back to East London - then I need to catch up on work there; so hopefully I will be able to start posting in this series from Friday.

Do you have a Raspberry Pi? Share in the comments what you use it for.

Friday, June 21, 2013

Interview with Mark and Dan from Jozi LUG

I did an interview with Mark and Dan for UbuntuLife, and wanted to share it with you:

Link

Let me know in the comments what you think about my writing style, and if I can improve the way that I interview people.

And please enjoy your weekend :)

LibreOffice can't spell check

When I installed Peppermint 4 not too long ago, I was not online at the time. I read the disclaimer that said that for best performance I should be. But my WIFI card was not installed automatically due to closed source drivers, etc.

After the install I noticed a message that told me that Language files were missing. "It's English, and everything works", I thought to myself. Then ignored it. However, after installing LibreOffice I noticed that although the program was set to spell check automatically, it did not.

I searched on Google, found a tutorial for how to install languages for Windows based LibreOffice and then it dawned on me... the missing languages.

If this happened to you and you want to fix it:

Click >> Menu, Preferences >> Languages
At the bottom of the window, click Install / Remove Languages
Choose from the list (I selected English to keep this simple)

Now LibreOffice can spell check and I am very happy. So, if possible try to be connected to the Internet during the installation.

Thursday, June 20, 2013

Getting Liferea set up with your Google Reader feeds

Time is running out, on 1 July 2013 Google Reader is no more. If you use this program now is your chance to get your feed list imported into another program.

But first, export your Google Reader feeds this way.

Now, if you have not already, install Liferea.
Open a Terminal window and type:
sudo apt-get install liferea
type in your password and press <ENTER>
answer yes if prompted

OK, you downloaded your feed list (it should be in your downloads folder). Go there now and extract it into a folder.


Next, open Liferea (should be listed in your Internet menu). I deleted most of their sample feeds.

Click on Subscriptions, Import feed list.

Now we need to take it to the Downloads folder, then to the folder that you extracted your Google Reader feeds to. Inside that folder is a Reader folder.

Now, note that above the Import button it says OPML files, set that to all files.

Double click on the file called subscriptions.xml and you are done.

Enjoy your RSS feeds!

And if you are interested, I use RSS to keep tract of podcasts. Let me know if you are interested in seeing my feed list.


Wednesday, June 19, 2013

Best Linux software - from Make Use Of

I love reading lists of the best software for Linux and Android. Make Use Of has an excellent list that you can view here. With 22 categories it really is very complete and I am sure you will meet at least 1 new friend here. No list is complete though, but this one makes a great effort to be.

I found Liferea here, among some other programs that I already use. Google Reader is shutting down on 1 July 2013. I'll have a blog post up soon showing you how to import your Google Reader feeds.

You can even check out some of the different Desktop Environments for Linux, everyone has a favourite - but it still is great to know something about the different options that are available.

They also have a selection of games mentioned, if you have spare time to play games that is ;)

Tuesday, June 18, 2013

Getting started with Peppermint

The Team Peppermint folks have a very nice user guide and if you have never seen it before I suggest you check it out.

It will help you with the basics and has 6 chapters:


Chapter One – Download and Install
Chapter Two – An Intro to the Desktop
Chapter Three – Customizing the Desktop
Chapter Four – Installing and Removing Software
Chapter Five – Site Specific Browsers and the Ice Application
Chapter Six – Additional Reading and Resources


To highlight something from the first chapter: why do I need to check the integrity of the disk image? If after installing Peppermint 4 you find that some things are not working right, then check the integrity of the ISO, only to find out that it's not right - then you have wasted all the time installing and configuring Peppermint. It took me less than 2 minutes to check the integrity of my Peppermint 4 ISO, and fortunately there was nothing wrong with it.

Do things right from the beginning so that you don't make more work for yourself later on.

Monday, June 17, 2013

Linux directory structure: an explanation

If you are a long time Windows user you are probably familiar with the Documents and Settings, Program Files and Windows folders. When you use Linux, things look very different. 

I was going to write a short guide on the subject (but I don't understand everything and I did not want to simply copy & paste info here) so I found 3 good guides for you to read on the subject.


I will however, discuss the directory that I am the most familiar with. The home directory. When you open the home directory you see a directory with your username, it is similar to the 

C:\My Documents if you were using Windows 98
C:\Documents and Settings\Username if you were using Windows XP, or 
C:\Users\Username if you were using Windows 7

The home directory has sub directories:

Desktop 
Contains your desktop shortcuts

Documents
Make sub directories to fit your needs and save your Word & Excel (or Writer & Calc) and other documents here.

Downloads
The folder your web browser downloads to by default that you are supposed to sort regularly, but seldomly do (well, me at least). Files are meant to stay here short term. 

Music
Put your mp3, ogg, aac, wav, flac, aif (or whatever format you use for your music) files here.

Pictures
A place to save all those lovely tux wallpapers and lol cat pictures you have been collecting. Cut & paste them here from the Downloads directory now ;)

Also a good place for storing your photos from your digital camera, etc.

Public
Used for sharing files over a network. 

Templates
Save your templates files here. Lots of programs like LibreOffice, Scribus & Inkscape use templates.

Videos
Remember to make sub folders here, otherwise things can get a bit messy. 


As you can see the folder structure is self explanatory, and you should not have any trouble with it. Remember that it is dangerous to mess around in folders that you don't understand what they are there for.

Sunday, June 16, 2013

Some of the apps that I use

I like installing apps as I am not always connected to the Internet to run webapps.

A few programs that I install after installing Peppermint:
  • Uninstall Transmission, install Deluge as it has more controls / settings. If your ISP does not like torrenting, you might have to click on "use random port" so that every time you start the program a different port is used. I reached a point on Mweb, where my torrents ran so slow that they basically weren't downloading any more.
  • Uninstall all music players. Then I install VLC. I am experimenting with Clementine, but I don't like stuff that catalogs my music collection. In VLC I can click on Open Folder, and as my mp3 albums are in their own folders this works good enough for me.
  • Install Shutter for screen shots and remove the other screen shot tool. I like Shutter more because of all the different settings.
  • Install Multiget, as a download manager, because having Telkom as my ISP means that I randomly loose connection and my downloads fail. Multiget has a huge icon in the start menu, something I need to find out how to fix.
  • Install Skype and Teamviewer, because I use these sometimes.
  • Install Audacity, I edit audio files and this works great.
  • Install Liferea, as Google Reader is shutting down.
  • Install LibreOffice, which is excellent.

There was a time when I worked a lot with fonts, and installed FontyPython. This time round I haven't gotten around to working with fonts yet. At the moment I am trying to learn Scribus and Gimp, I found some good tutorials at ShowMeDo. They have tutorials for lots of different open source software.

Share the list of things you do after a fresh install in the comments.

Saturday, June 15, 2013

error: file not found. grub rescue>

Sometimes I wonder why I find it so "easy" to break stuff on Linux... oh well at least I keep trying :)

Today I installed the release version of Peppermint 4 on my Lenovo S10e, everything went well until I rebooted and had an error message staring me square in the face. I was not impressed. (I dual boot Windows XP and Peppermint on my netbook as I need Windows for Corel Draw and a few other things that I have not yet mastered on Linux).

I Googled and found this page: http://www.maketecheasier.com/recover-from-the-file-not-found-grub-rescue-screen/2012/10/25 and I was very grateful for the help I received. So grateful that I am willing to donate towards this piece of software as it saved me from having to do at least a day's worth of work to get everything installed, activated and working again.

It seems I had selected the wrong boot flag or something, anyways I had to get this netbook booting again.

Here are the steps listed on the site:


1. Rebooted my netbook using the Peppermint 4 flash drive I made using Unetbootin

2. Select the “Try Peppermint” after booting, open a Terminal window

3. Install Boot Repair. (For this to work, you have to be connected to the Internet - more on this later)

sudo add-apt-repository ppa:yannubuntu/boot-repair
sudo apt-get update
sudo apt-get install boot-repair

4. Run Boot Repair with the command

boot-repair

Selecting Recommended repair sorted me out. My dual boot was saved!

I want to start a donations page on my blog, listing all the software that I use frequently and want to start donating to (check the page on the right hand side of the blog).

Installing my HP Laserjet 1010 on Peppermint 4

I know I have made a lot of blog posts today, compared to what I normally do, but it's important to write this stuff down before I forget.

After installing Peppermint 4, my printer is not automatically detected.
I downloaded hplib using Software Manager.
Click on Menu >> System Tools >> Printers
Click Add
My printer appears in the list that just opened
I clicked Forward
Ticked Duplexer Installer
Apply & print a test page
It works, yeah!

I am very glad that it was this easy to install, not sure if I missed a step last time I write about printing. Hopefully I've done a better job on writing about it this time.

Conky guide for Peppermint 4

I've done bits and pieces on conky before, here I would like to combine everything from start to finish. I love programs like conky, because I want to be able to see how fast something is downloading, or how hard my CPU is working or even what process is is using the most memory at a glance.


There is a lot more that can be done with conky, you can use different fonts, for example. But I'm using it on a 10" netbook monitor, so that's why mine looks the way it does.

Installing Conky


Fire up a Terminal window, type: sudo apt-get install conky

Type root user password and press <ENTER>, the thing is that I keep forgetting how to make Conky autostart.

Making Conky autostart


Open File Manager
Go to /etc/xdg/lxsession/Peppermint
Click on Tools >> Open current folder as Root
Enter your Root password, press <ENTER>
Right click on autostart, left click on Text Editor
Add @conky at the bottom of the file
Save & exit

This should work for making other programs run at startup as well.

The thing about doing stuff like this is if you don't reinstall often, you can forget this - I did at least, so adding it to this blog helps me next time I need to do it.

Customizing Conky:


The config file is located in: etc/conky
Click on Tools >> Open current folder as Root
Enter your Root password, press <ENTER>
Right click on conky.conf , left click on Text editor

Be careful what you change here. Make a backup of your current script before you change anything.

A screenshot of my conky


Here's my conky script


You can copy and paste this over yours if you like:


background yes
use_xft yes
xftfont Sans:size=8
xftalpha 1
update_interval 1.0
total_run_times 0
own_window yes
own_window_transparent yes
own_window_type normal
own_window_hints undecorated,below,sticky,skip_taskbar,skip_pager
double_buffer yes
minimum_size 200 700
maximum_width 400
draw_shades yes
draw_outline no
draw_borders no
draw_graph_borders yes
default_color white
default_shade_color black
default_outline_color white
alignment top_right
gap_x 12
gap_y 12
no_buffers yes
text_buffer_size 1024
uppercase no
cpu_avg_samples 2
override_utf8_locale no

TEXT
${font sans-serif:bold:size=8}SYSTEM ${hr 2}
${font sans-serif:normal:size=8}$sysname $kernel $alignr $machine
Host:$alignr$nodename
Uptime:$alignr$uptime
Battery Status: $alignr$battery

${font sans-serif:bold:size=8}PROCESSORS ${hr 2}
${font sans-serif:normal:size=8}${cpugraph cpu1}
CPU1: ${cpu cpu1}% ${cpubar cpu1}

${font sans-serif:bold:size=8}MEMORY ${hr 2}
${font sans-serif:normal:size=8}RAM $alignc $mem / $memmax $alignr $memperc%
$membar

${font sans-serif:bold:size=8}DISKS ${hr 2}
${font sans-serif:normal:size=8}/ $alignc ${fs_used /} / ${fs_size /} $alignr ${fs_used_perc /}%
${fs_bar /}
SWAP $alignc ${swap} / ${swapmax} $alignr ${swapperc}%
${swapbar}

${font sans-serif:bold:size=8}TOP PROCESSES ${hr 2}
${font sans-serif:normal:size=8}${top_mem name 1}${alignr}${top mem 1} %
${top_mem name 2}${alignr}${top mem 2} %
$font${top_mem name 3}${alignr}${top mem 3} %
$font${top_mem name 4}${alignr}${top mem 4} %
$font${top_mem name 5}${alignr}${top mem 5} %

${font sans-serif:bold:size=8}NETWORK ${hr 2}
${font sans-serif:normal:size=8}IP address: $alignr ${addr eth1}
ESSID: $alignr ${wireless_essid eth1}
${downspeedgraph eth1}
DLS:${downspeed eth1} kb/s $alignr total: ${totaldown eth1}
${upspeedgraph eth1}
ULS:${upspeed eth1} kb/s $alignr total: ${totalup eth1}


Enjoy the goodness that is conky!

Getting my wireless working on Peppermint 4

My wifi card is not supported by default, as the source code has not been released by Broadcom. I can still install drivers for it, I just can't use wifi. Until recently this meant plugging into a router or using a 3G dongle, but now that I have an Android phone I can enable USB Tethering and use the wifi connection on my phone.

Now, while I was testing Peppermint 4 I battled to get wireless enabled. PCnetSpec helped me to get it going and from there it worked.

Open a Terminal, type in: sudo apt-get install firmware-b43-lpphy-installer
It installed first try.

Now with the reinstall, his advice no longer worked. I was all over the place enabling other repositories, installing Broadcom packages in Software Manager. I Googled, nothing helped.

Suddenly I managed to get the advice PCNetSpec (from www.peppermintos.net) gave me to work, I rebooted. Then nothing. Wifi was still eluding me somehow. In Software Manager I saw that I had the wrong driver installed, so I uninstalled the Broadcom package that I had loaded, then I noticed that wifi was turned off somehow. I rebooted into the BIOS and found that wifi was in fact enabled. I pressed Fn and F5 (which toggles my wifi in Windows) nothing. I tried Ctrl and F5 and F5 on its own, no dice.

I right clicked on networking and found that wifi had somehow been turned on - jay! I went back to Software Manager and was able to set Peppermint to use a different driver for my wifi card.


The point of the story? I haven't arrived yet, even now, years after I started using Linux on a regular basis I still manage to break things or battle to install certain things. If I can do it (a long term Windows user whose first experience with Linux was Mandrake 7 where you still needed to mount your drives manually) then I encourage you to try Linux as well. I am still here and am able to work productively on Linux [most of the time]. Don't give up, or get discouraged when things go wrong, oh and backup your data before you do anything major; you will thank me for that if you accidentally break something.


Peppermint 4: A word from the developer and a few of the testers

On Friday 14 June 2013 Peppermint 4 was released to the public. It is available in 32 and 64 bit versions, from their website. It has a traditional desktop interface, with an emphasis on the cloud, as it uses the ICE application to create “site specific browsers” (SSB's) to run web applications (in a web browser window) for many of the programs. For example: an office suite and image manipulation program are not installed as desktop apps. You can use the webapps provided, or use ICE (in the Internet section of the menu) to create your own SSB's.

Cloud computing has never been more popular than today; think how many companies are betting on the cloud: Microsoft with Skydrive and Office 365, Google with Google Drive, and Dropbox to name but a few. One of the benefits of running cloud apps are that there is less software for you to update. When the webapp is updated, you immediately have the latest version.

You can also install desktop versions of apps if you choose, and herein lies the beauty: choice. I love having the choice to do things or avoid them. While running your entire OS from the cloud could be problematic, running webapps is generally a lot more stable (depending on your Internet connection).

During the last year or so, Peppermint has been receiving a lot of good press from technology bloggers. It's built for speed, stable and a distro that you should try at least once during  your time with Linux.


The developer and creator: Kendall Weaver

Tienie: Hi Kendall, would you mind answering a few questions?

Kendall: Hi. I'd be glad to answer some of your questions.


Kendall Weaver

Tienie: Thank you for taking time out from your busy schedule. I would like to know why you started Peppermint, instead of being part of an already existing distro?

Kendall: I previously worked with Linux Mint as a distribution maintainer and though I love the project, there were some things I saw with their direction that I thought could be addressed differently. I wanted to offer a distro that was leaner than what Mint offered but with some of the same features and applications. I also was a big fan of using web apps for most tasks and most existing distros were not experimenting with them at all at the time. Mint has always seemed to come by default with a locally installed application for just about everything. I thought this could be done much differently so I started thinking about offering a distro with web apps rather than locally installed ones and this ended up being the biggest push for me to start working on Peppermint.
 
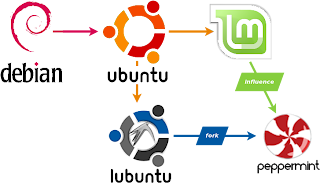
The roots of Peppermint

Regarding having a lean distro on the Ubuntu code base, some people pointed to Lubuntu, which was really starting to gain traction at the time, but I didn't always agree with their direction either. For instance I recall some messages from their mailing list regarding potentially changing from leafpad to gedit as the default text editor. They made the decision to stick with leafpad, a default LXDE component, which I didn't agree with from an ease of use standpoint. Little things like this also heavily impacted my decision to make another distro.

Tienie: With Linux having more than 5 desktop interfaces, why do you prefer the LXDE desktop interface?

Kendall: Three reasons really stick out: ease of use, how modular it is, and how lightweight it is. LXDE is incredibly simple to use, especially for new Linux users and this was one of the most major factors in the decision to use it. It does have some downsides in that some of the LXDE components aren't the most user friendly. The modular nature of LXDE really helps here as it's rather painless to simply use other things. The only two components of LXDE that really seem 100% necessary are pcmanfm and lxsession, everything else can be replaced and Peppermint takes advantage of this more than any other LXDE based distro that I'm presently aware of though I'm certain I haven't used them all. The fact that LXDE is also very lightweight certainly helps justify my decision to use it.

Tienie: What are your future plans for Peppermint?

Kendall: I can't give up too many details but I will say that we're looking into offering some of our own services designed to better integrate Peppermint with the cloud and assist people that use multiple computers.

I hope this has been helpful. Cheers.

Tienie: Thanks Kendall, that's great.


The testers:

Most of the testers didn't want to be interviewed, fortunately we have input from two of the testers.

Tester No 1

Tienie: Hi, can I call you by your forum nick, or can I use your real name?

Daniel: My name is Daniel Burke. I use a few different nicknames online, but I generally prefer people to know who I am. I am especially proud of my part in Peppermint 4, so feel free to use my real name.

Tienie: Please share with us your opinion on Peppermint 4 and the testing process.

As the art director for Peppermint, I was set up and testing long before a beta for '4 came out. Initially, I was using Peppermint 3 as a base to work and test. Eventually, enough came together, and a preliminary Alpha release was shared.

While others were working on different parts of the project, we all were multitasking in the same fashion; working on Peppermint 4 and scouring each release and update for anything we could fix or improve. In the early Alpha, there were a few things that sometimes gave a couple hiccups. We worked through them, and kept at it, until the Beta was put together.

Beta was a a little bit different in that we were trying to have it polished up enough for our private group of testers.

Even though I had been working on it, and had already seen pretty much all the different parts that were included, I was still kinda blown away by how nice it looked, and fit together. Beta was the point where it finally sunk in for me, that this was going to be something awesome.

After a couple updates to Beta, there really wasn't much "testing" for me to do. I'm not really much of a developer, or know much about coding, so forcing bugs out, and figuring out how/what causes them, isn't something I'm really good at. On top of that, there simply weren't that many bugs, and almost none of them affected my use.

In the later days of Beta, I was using the OS as my primary desktop. I did all my work in it, and personal use as well. Sometimes, I would almost forget that this wasn't a finished product. It worked, so I used it. Eventually, as work on '4 wound down, I was simply counting down the days until I could show it off to people.

I already knew that we were holding some things back from the beta testers, so that everyone could experience at least a little bit of "wow factor" when the final version came out, but some parts were still a surprise to me. I had heard talk of a new web site design, but didn't get a single glimpse at it until today (release day). I love it, and am really pleased with all of our work. When it's all said and done, I thank the rest of the team, our testers, and all the users out there. I'm just happy to be a part of it all.

If you have other questions or anything, please feel free to contact me. Thanks for the interview, and for all the other help along the way.

Tester No 2

Tienie: By some lucky coincidence, I also managed to be a tester for Peppermint 4. I saw that they were looking for testers on the Peppermint Facebook page and signed up. I don't think that I was chosen because of my technical skills, but rather because of my passion for Peppermint and spreading the word about it.

I've been using Linux on and off for years, I found it difficult to get into as I didn't have ADSL when I started with Mandrake 7 and later with Ubuntu Warty Warthog. 3G was very expensive at the time as well, which meant that I could not ask anyone for help. I was introduced to Peppermint by a friend, Quintin van Rooyen, who sent me a flash drive with a few Linux ISO's on it. He is very much into Linux and I found that inspiring. I cottoned on to Peppermint ICE, started a blog to keep track of what I had learnt (and something to look back at when I broke stuff or had to reinstall). Today my little blog has more than 6000 page views, around 16 a day and I try in my own little way to spread awareness of Peppermint.

I found the “test version” of Peppermint 4 to be very stable. Not many bugs were found and most of them were not serious. I was very impressed with the build quality of the test version.

After installing I tried to test everything I could, to see if it worked or was broken. I was the first tester to find out that GWoffice had a problem creating documents, it was a registered bug and Kendall decided to use Google Drive SSB instead. I was very happy to have found something small that did not work, it meant that I had done my job.

Final words


I hope that you have enjoyed this behind the scenes look into the world of Peppermint 4, the lightweight and stable, LXDE desktop Linux. Please feel free to leave a comment or two below.

Sunday, June 9, 2013

Samsung Galaxy S4 eWarranty

The Samsung Galaxy S4 has an accidental damage warranty that allows you to have the screen replaced twice and the motherboard replaced once during your 2 year contract (at no extra charge to you).

All you need to do is register your phone for the warranty, then if something happens take it to a Samsung Repair Center (not to the cellular network that sold you the phone).

Opinions differ, but it seems there are two ways to register for this. The first is to go to the Samsung website, then click on Product registration (top right hand corner).

(Please note that there are 12 different model numbers for the S4, for safety sake - use the printed information on the box of your unit).

A new page will load, click on the (blue) Join or Sign up button. You will be taken to a page where you will need to enter some information about the phone, ie. Model number, serial number, purchase date and upload a scanned copy of your proof of purchase. Enter all the details and your phone should be registered for the eWarranty.

The second way, (according to this page) (this works in South Africa, not sure what the International numbers are to register it) you can SMS:

REG*IMEI#

to 34622

You need to substitute the IMEI with your phone's full IMEI number (printed on the box of your phone and on a sticker on the inside of the phone near the battery, you can also dial *#06# on your phone to see your IMEI).

You should receive an SMS back to say that you are registered. So a sample SMS would look like this:

REG*354242076452552#

(this is an IMEI number that I made up, so please don't use it as it is probably not for a S4).

With such a great warranty, you should really sign up for it.

Saturday, June 8, 2013

Please sign the petition to get Google Drive on Linux

Google Drive does not, at this point, have a Linux client. Please sign this petition.

Would be great if that could change.

Friday, June 7, 2013

Peppermint 4 out June 14


226727_589971214366492_1870870065_nThe latest version of Peppermint is due for release on June 14. The main site, www.peppermintos.com , is going down to be updated for the release. The forum, www.peppermintos.net will remain up to help users.
Coming soon: A behind the scenes interview on the launch of Peppermint 4. Expect to hear from the developers and testers who helped build and perfect this distro.
Stay tuned for further information.
(Peppermint is based on Lubuntu, which is based on Ubuntu. It uses the LXDE desktop interface instead of Unity).

Monday, June 3, 2013

How to try Linux, without installing it to your PC

Ever wanted to try Linux, but did not want to install it... just in case you did not understand it enough to use it or you were interested to try a new version of Linux, but you didn't know if you would like it enough to have it installed permanently?

Check out my tutorial on UbuntuLife on:
How to try Linux, without installing it to your PC

Sunday, June 2, 2013

Different ways of installing software in Ubuntu

The second tutorial from my work at Ubuntu Life, here is:

Different ways of installing software in Ubuntu

This tutorial shows 3 different ways for you to install software on Ubuntu or an Ubuntu based version of Linux.

Disk labels in Linux

I have started writing new tutorials for www.ubuntulife.co.za/forums (where I am a staff writer and Moderator).

If I have time, I will rewrite them here, otherwise I will just post links to them here.

Here is the first Tutorial: Disk labels in Linux

More to follow soon.

Wednesday, May 29, 2013

www.ubuntulife.co.za

I have joined the Ubuntu Life team as a staff writer after accepting the open invitation to forum members.

The forum is focused on Ubuntu and it's derivatives, but also features other Linux distributions. It has a news section, where I post Linux news that we are the writers find interesting.

The forum started about 2 months ago, and has had visitors from all around the world. Still a small forum, but I am sure that it will grow quickly.

Why not join the forum and chat with us about Linux? Check out Ubuntu Life

My current Conky script

Because I love system monitors, I always go back to using Conky.

Here is my current Conky Script:


background yes
use_xft yes
xftfont Sans:size=8
xftalpha 1
update_interval 1.0
total_run_times 0
own_window yes
own_window_transparent yes
own_window_type normal
own_window_hints undecorated,below,sticky,skip_taskbar,skip_pager
double_buffer yes
minimum_size 200 700
maximum_width 400
draw_shades yes
draw_outline no
draw_borders no
draw_graph_borders yes
default_color white
default_shade_color black
default_outline_color white
alignment top_right
gap_x 12
gap_y 12
no_buffers yes
text_buffer_size 1024
uppercase no
cpu_avg_samples 2
override_utf8_locale no

TEXT
${font sans-serif:bold:size=8}SYSTEM ${hr 2}
${font sans-serif:normal:size=8}$sysname $kernel $alignr $machine
Host:$alignr$nodename
Uptime:$alignr$uptime
File System: $alignr${fs_type}

${font sans-serif:bold:size=8}PROCESSORS ${hr 2}
${font sans-serif:normal:size=8}${cpugraph cpu1}
CPU1: ${cpu cpu1}% ${cpubar cpu1}

${font sans-serif:bold:size=8}MEMORY ${hr 2}
${font sans-serif:normal:size=8}RAM $alignc $mem / $memmax $alignr $memperc%
$membar

${font sans-serif:bold:size=8}DISKS ${hr 2}
${font sans-serif:normal:size=8}/ $alignc ${fs_used /} / ${fs_size /} $alignr ${fs_used_perc /}%
${fs_bar /}
SWAP $alignc ${swap} / ${swapmax} $alignr ${swapperc}%
${swapbar}

${font sans-serif:bold:size=8}TOP PROCESSES ${hr 2}
${font sans-serif:normal:size=8}${top_mem name 1}${alignr}${top mem 1} %
${top_mem name 2}${alignr}${top mem 2} %
$font${top_mem name 3}${alignr}${top mem 3} %
$font${top_mem name 4}${alignr}${top mem 4} %
$font${top_mem name 5}${alignr}${top mem 5} %

${font sans-serif:bold:size=8}NETWORK ${hr 2}
${font sans-serif:normal:size=8}IP address: $alignr ${addr eth1}
ESSID: $alignr ${wireless_essid eth1}
${downspeedgraph eth1}
DLS:${downspeed eth1} kb/s $alignr total: ${totaldown eth1}
${upspeedgraph eth1}
ULS:${upspeed eth1} kb/s $alignr total: ${totalup eth1}

And here is a screenshot:


Thursday, April 4, 2013

Printing on Peppermint

This has been something new for me, because when my Epson photo print broke a few years ago I never bought a replacement. I printed at small copy shop and was very happy because I did not need a lot of prints.

Now I have a HP 1010 laser printer and wanted to share my getting started experience.

Plugged it in, Peppermint detected it and started downloading drivers. I printed a test page and all seemed well. Unfortunately it would not print from LibreOffice or Firefox. I searched the Peppermint forums and found a suggestion to print from a different program. So I tried the Document Viewer and was able to Print a PDF file.

When it does not print: The document is sent to the print que, and as far as the computer knows, it is printed. Which of course makes no sense to me as I am not a programmer.

I am investigating and will post an update as soon as I have found the answer.

Update: a reboot later my printing problems are over. Not sure what happened, but it's working.