Sunday, October 12, 2014

Home server problems

At the moment Google Cloud print says my printer is offline.

This even though my desktop pc and printer are both on and I am able to print from my desktop.

To make matters worse, I was able to install my printer as a network printer, but I am battling to print to it. It asks for authentication and then never prints.

My time is limited right now, so I used a flash drive to copy from my laptop to desktop and printed from there. I will try again when I have more time.

How to change Peppermint back to normal after making it look like MacOS

Remove Cairo from the list of apps that run at startup
Move the system tray back to the bottom
Right click the system tray, then left click Panel Settings
Click on Bottom
Click Close

Changing the theme:
Click Menu > Preferences > Customise look and feel
On Widget menu select Orion Peppermint
On Icon menu select the one on top
On the Mouse menu select Black or White

Changing _+X
Click Menu > Accessories >> Terminal
Type in:
xfwm4-settings and press <ENTER>
On the style menu, select Peppermint
Click and drag the _+x buttons to the right
Click close

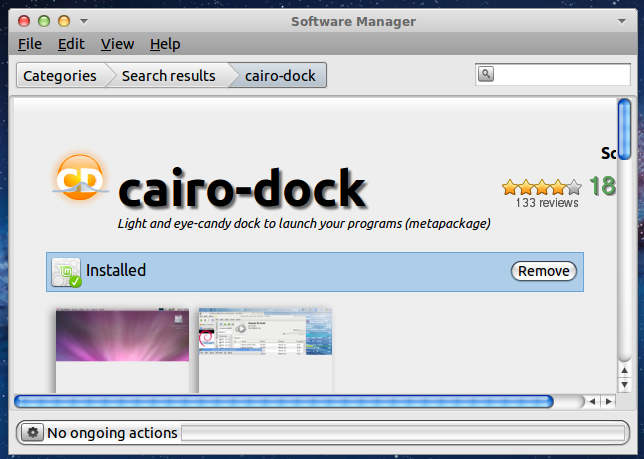
Removing Cairo dock
Click Menu > Software Manager
Search for Cairo
Double click Cairo dock
Click Uninstall

Remove Cairo dock from auto starting:
Click Menu > File Manager
Click View > Hidden files
Right click on .config
Left click on Open as Root
enter your sudo password and press <ENTER>
Delete the Cairo file

Change your wallpaper and you should be all done.

Saturday, October 11, 2014

Make Peppermint 5 look like MacOS

(Hi everyone, this tutorial is 99% finished, as I still need to add screen shots and proof read it once or twice. Please let me know if I got anything wrong here.)

You will need a few things to get the job done:

  • A theme
  • A dock
  • A set of icons
  • Appropriate wallpapers

Step one: Download the theme
Click the link, then look for the download button near the bottom of the page. Click it, you might be asked if you wish to save the file, select yes. Double click the downloaded file, click Install package (top left corner)

Step two: download Cairo dock
Click Menu, Software Manager. Enter your sudo password when asked and press <ENTER> Search for Cairo dock. Double click on the package. Click install. You can close Software Manager.


Step three:
Right click on the taskbar then left click on Panel settings. Click on Top (under Position). Click Center (under Alightment).
Click Close.

Step four:
Click Menu > System Tools > Cairo Dock.
Right click on the dock, then left click on Configure
Click on the Themes tab, then click on MacOS X.
Click Apply, then Close. 

Step five:
Click Menu > Preferences > Customize look and feel
In the widget tab, select MintyMacOsX
In the Icon tab, select MintyMacOsX-icons
On the Mouse cursor tab, select MintyMac-cursors
Click Apple, then Close

Step six:
Click Menu > Accessories >> Terminal
Type in:
xfwm4-settings and press <ENTER>
On the style menu, select MintyMacOsX
Click and drag the _+x buttons to the left
Click close

Step seven:
Right click on Cairo dock
Select Run at startup (I forgot what this is called and where exactly on the menu it is, but I found it easily so I hope you will too). 

Step eight:
Go to https://db.tt/ZgRKkxTe and download the image
Go to https://db.tt/fHQTW6WA and download the image
Go to https://db.tt/bj4NAuJR and download the image

Step 8.1:
Click Menu > File Manager
Go to your Downloads folder
Right click on one of the 3 images you downloaded
Left click on Set as Wallpaper


This should do it. Please let me know if I left anything out.

Home server continued

I decided that (for now) I will use my Pentium 4 desktop as a file and print server.

With Peppermint already installed, click Menu > Software Manager.

In a nutshell, this is what I did:

To enable file sharing:

Type in your sudo password and press <ENTER>
Click Featured
Double click Peppermint-Networking-Pack
Install it, click install

Click Menu > System tools > Samba
Type in your sudo password and press <ENTER>
Click Menu > File Manager
Create a folder to share
Click File > Create New > Folder
(mine is called dumpster)
Type a name and press <ENTER>
Go back to Samba
Click +
Click browse and locate the folder you created
Click OK
Click the check boxes next to writeable and visible
On the Access tab, click Access to everyone
Click OK
Close Samba
Go back to File Manager
Right click on the folder you created
Left click on Properties
Click on Permissions
Under Access control, change the 3 settings to everyone

You now have a shared folder that anyone on your network can copy to and from.
WARNING: never share your home or root folder

If you use ES File Explorer on Android you can access samba shares.
Open the app, swipe right until you get to network shares.
Click Scan
You will see the IP addresses of computers on your network.
You can copy to your phone as well as from your phone into the shared folder dumpster (if you also called it that).

Cloud printing:

I have an old HP Laserjet 1010, which does not have wifi. Open Chromium or Chrome (if it is not already open) then click on the three stripes (top right corner)
Click on Settings
Click Advanced settings
Go to Google cloud print and add your printer to the list
(make sure your printer is connected to your computer, powered on and that drivers are installed before doing this. If it can't print it won't work).


You can also download the Google Cloud Printing app from the Google Play Store onto your phone or tablet to print from them.

To enable printing from other computers on your home network:
Click Menu > System Tools > Samba
Set the printer to be visible across the network and for other computers to be able to access it.


I will try to update this post with a few screenshots when I have time.


Saturday, October 4, 2014

Considering a home server

At this point I need to get a home server running. Specifically a file server, where I can save data to - instead of having some files on my laptop, some on my external HDD, some on my phone and still more data on my tablet. This is not a good way to work and I would like 1 place to have everything. One location where I can save to and where I can access my downloads and other data.

For this I have a few options: NAS or Network Attached Storage, is an option. But buying a NAS box - or an old PC is expensive and will be expensive to run (electricity is expensive and I don't want to run a PC 24/7).

Fortunately there is a mini PC that I can buy (relatively) cheaply, which will run Linux (yeah!). Enter the Raspberry Pi. It runs on a cell phone charger for power and I will connect an external HDD to it for storage. I can either plug it directly into the router at home, or use a WiFi dongle.

This is what I plan to do as soon as I have some spending money. In the mean time, here are a few sites I am reading up on:

http://www.zdnet.com/raspberry-pi-11-reasons-why-its-the-perfect-small-server-7000025206/
http://www.linuxjournal.com/content/raspberry-pi-perfect-home-server
http://www.maketecheasier.com/turn-raspberry-pi-into-file-server/