Saturday, December 13, 2014

Linux malware and viruses

Traditionally you never needed to run an anti virus or use anti malware software while running Linux. According to the Kaspersky blog:  https://securelist.com/blog/research/67962/the-penquin-turla-2/ malware has been spotted.

Up until this time, Turla has only been spotted  on Windows PC's, but now there is a Linux variant. I am not going to try and explain what it is and what it does, rather read the article above.

As Linux grows in popularity, it will grow as a viable target for malware and virus creators. Hopefully security experts will help to keep Linux a secure operating system.

Don't panic yet, Linux is still much more secure than any version of Windows ;)

Sunday, October 12, 2014

Home server problems

At the moment Google Cloud print says my printer is offline.

This even though my desktop pc and printer are both on and I am able to print from my desktop.

To make matters worse, I was able to install my printer as a network printer, but I am battling to print to it. It asks for authentication and then never prints.

My time is limited right now, so I used a flash drive to copy from my laptop to desktop and printed from there. I will try again when I have more time.

How to change Peppermint back to normal after making it look like MacOS

Remove Cairo from the list of apps that run at startup
Move the system tray back to the bottom
Right click the system tray, then left click Panel Settings
Click on Bottom
Click Close

Changing the theme:
Click Menu > Preferences > Customise look and feel
On Widget menu select Orion Peppermint
On Icon menu select the one on top
On the Mouse menu select Black or White

Changing _+X
Click Menu > Accessories >> Terminal
Type in:
xfwm4-settings and press <ENTER>
On the style menu, select Peppermint
Click and drag the _+x buttons to the right
Click close

Removing Cairo dock
Click Menu > Software Manager
Search for Cairo
Double click Cairo dock
Click Uninstall

Remove Cairo dock from auto starting:
Click Menu > File Manager
Click View > Hidden files
Right click on .config
Left click on Open as Root
enter your sudo password and press <ENTER>
Delete the Cairo file

Change your wallpaper and you should be all done.

Saturday, October 11, 2014

Make Peppermint 5 look like MacOS

(Hi everyone, this tutorial is 99% finished, as I still need to add screen shots and proof read it once or twice. Please let me know if I got anything wrong here.)

You will need a few things to get the job done:

  • A theme
  • A dock
  • A set of icons
  • Appropriate wallpapers

Step one: Download the theme
Click the link, then look for the download button near the bottom of the page. Click it, you might be asked if you wish to save the file, select yes. Double click the downloaded file, click Install package (top left corner)

Step two: download Cairo dock
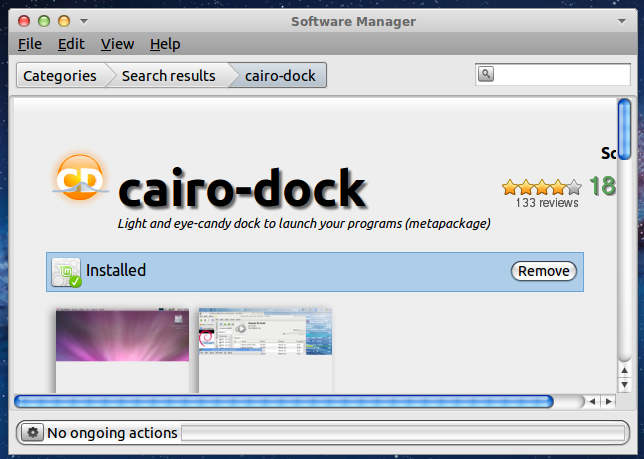
Click Menu, Software Manager. Enter your sudo password when asked and press <ENTER> Search for Cairo dock. Double click on the package. Click install. You can close Software Manager.


Step three:
Right click on the taskbar then left click on Panel settings. Click on Top (under Position). Click Center (under Alightment).
Click Close.

Step four:
Click Menu > System Tools > Cairo Dock.
Right click on the dock, then left click on Configure
Click on the Themes tab, then click on MacOS X.
Click Apply, then Close. 

Step five:
Click Menu > Preferences > Customize look and feel
In the widget tab, select MintyMacOsX
In the Icon tab, select MintyMacOsX-icons
On the Mouse cursor tab, select MintyMac-cursors
Click Apple, then Close

Step six:
Click Menu > Accessories >> Terminal
Type in:
xfwm4-settings and press <ENTER>
On the style menu, select MintyMacOsX
Click and drag the _+x buttons to the left
Click close

Step seven:
Right click on Cairo dock
Select Run at startup (I forgot what this is called and where exactly on the menu it is, but I found it easily so I hope you will too). 

Step eight:
Go to https://db.tt/ZgRKkxTe and download the image
Go to https://db.tt/fHQTW6WA and download the image
Go to https://db.tt/bj4NAuJR and download the image

Step 8.1:
Click Menu > File Manager
Go to your Downloads folder
Right click on one of the 3 images you downloaded
Left click on Set as Wallpaper


This should do it. Please let me know if I left anything out.

Home server continued

I decided that (for now) I will use my Pentium 4 desktop as a file and print server.

With Peppermint already installed, click Menu > Software Manager.

In a nutshell, this is what I did:

To enable file sharing:

Type in your sudo password and press <ENTER>
Click Featured
Double click Peppermint-Networking-Pack
Install it, click install

Click Menu > System tools > Samba
Type in your sudo password and press <ENTER>
Click Menu > File Manager
Create a folder to share
Click File > Create New > Folder
(mine is called dumpster)
Type a name and press <ENTER>
Go back to Samba
Click +
Click browse and locate the folder you created
Click OK
Click the check boxes next to writeable and visible
On the Access tab, click Access to everyone
Click OK
Close Samba
Go back to File Manager
Right click on the folder you created
Left click on Properties
Click on Permissions
Under Access control, change the 3 settings to everyone

You now have a shared folder that anyone on your network can copy to and from.
WARNING: never share your home or root folder

If you use ES File Explorer on Android you can access samba shares.
Open the app, swipe right until you get to network shares.
Click Scan
You will see the IP addresses of computers on your network.
You can copy to your phone as well as from your phone into the shared folder dumpster (if you also called it that).

Cloud printing:

I have an old HP Laserjet 1010, which does not have wifi. Open Chromium or Chrome (if it is not already open) then click on the three stripes (top right corner)
Click on Settings
Click Advanced settings
Go to Google cloud print and add your printer to the list
(make sure your printer is connected to your computer, powered on and that drivers are installed before doing this. If it can't print it won't work).


You can also download the Google Cloud Printing app from the Google Play Store onto your phone or tablet to print from them.

To enable printing from other computers on your home network:
Click Menu > System Tools > Samba
Set the printer to be visible across the network and for other computers to be able to access it.


I will try to update this post with a few screenshots when I have time.


Saturday, October 4, 2014

Considering a home server

At this point I need to get a home server running. Specifically a file server, where I can save data to - instead of having some files on my laptop, some on my external HDD, some on my phone and still more data on my tablet. This is not a good way to work and I would like 1 place to have everything. One location where I can save to and where I can access my downloads and other data.

For this I have a few options: NAS or Network Attached Storage, is an option. But buying a NAS box - or an old PC is expensive and will be expensive to run (electricity is expensive and I don't want to run a PC 24/7).

Fortunately there is a mini PC that I can buy (relatively) cheaply, which will run Linux (yeah!). Enter the Raspberry Pi. It runs on a cell phone charger for power and I will connect an external HDD to it for storage. I can either plug it directly into the router at home, or use a WiFi dongle.

This is what I plan to do as soon as I have some spending money. In the mean time, here are a few sites I am reading up on:

http://www.zdnet.com/raspberry-pi-11-reasons-why-its-the-perfect-small-server-7000025206/
http://www.linuxjournal.com/content/raspberry-pi-perfect-home-server
http://www.maketecheasier.com/turn-raspberry-pi-into-file-server/

Monday, September 8, 2014

Kingsoft Office on Linux

LibreOffice has always had a special place in my heart. I have been using it since OpenOffice was at version 1 and I have seen the project advance in leaps and bounds over the years.

Since then they branched off and now I use LibreOffice. Now they have some competition. I have been using Kingsoft Office (WPS) on my phone and tablet for a a few months now. Time to test their Linux version and see how it compares with LibreOffice. Know that this is an alpha release, meaning that it has not yet reached the beta testing phase - meaning that it is still very much in development. 

First, go to http://wps-community.org/download.html and download the .deb file and fonts .deb file under it. 

To install, double click on the .deb file you just downloaded. Then click on the Install Package button, in the top right corner of the window. Installation was not difficult or complicated. 

The interface looks similar to Microsoft Office, ie. The Ribbon. While LibreOffice still looks basically the same as Office 2003 (even after all this time). I will not break off into a discussion of whether the interface should have been left the way it was, the whole leave well enough alone vs update the interface to something more current as that is a very long story. 

Well, looks like you can choose your interface, which I think is cool:


I decided to open a document created in LibreOffice, to see how WPS office would render it. Well, it was not pretty. 

(this is after I set the paragraph spacing to single) Can I fault it for not being able to open a document created by a rival? No, after all this is an alpha release and just being able to create documents and export them to PDF is enough for a reasonable person.

The ribbon interface is pleasant and easy to use, I am not going to do an in depth test here as I don't have the time. But I am going to be using WPS Office regularly over the next few weeks I hope to have a follow up post or two mentioning my progress and any issues I have encountered.

Post your opinion in the comments below.


Sunday, September 7, 2014

Suggestions please

Hi everyone, I have not opened the floor to suggestions so far. I thought this might be a good time to do so now.

So please post in the comments if you are looking for a certain app, or you need to do something specific or just on Linux in general and if I can work it out I will post it soon.

I have a lot of people reading my blog with a minimal amount of interaction. I want to say thanks for reading and this is one way that I can do so.

Tuesday, September 2, 2014

Copy.com

You might have noticed that the frequency of my blog posts has slowed down considerably.

This normally happens once I have gotten my system up and running with a fresh install, the kinks are worked out (meaning that my wifi driver is installed), I have my favourite apps installed and I am basically almost out of material.

Don't despair however, as I recently discovered Copy.com (a suggestion someone made on a forum for a discussion of what to do now that Ubuntu One has closed down). I am interested in Copy.com because of the initial 15 GB you get when you join and for the additional 5 GB you get for every referral (up to 5 referrals) and the rest you pay for. I am a long term Dropbox user, and they have been very good to me. During the time that I did computer training I installed Dropbox on a lot of computers and I was able to get my storage up to 13 GB free space.

Although, I normally don't use more than about 1 GB of space in my Dropbox account - I considered Copy.com because of the benefits it has for people I know. I know a lot of people who have a free 2 GB Dropbox account which is nearly full, and migrating over to a new service makes a lot of sense if you get more space.

Caution, rant follows >>>

My max upload speed is about 50 kb per second at the moment (the joys of adsl in South Africa, where our maximum Internet lines in my area are 10 Mbps for R399 (USD 38) per month, with an additional R399 (USD 38) per month fee for Uncapped Internet. So I have a slow entry level line, which means that it will take days (maybe even a week) to fill my copy.com account.

Internet access in South Africa is expensive by my standards. 3G data is very expensive as well, but I am getting totally off track now.

<<<<<< rant ended

My point is that I was only able to really get into Linux when I had a "decent" Internet connection. Downloading a 700 MB file over 3G can easily cost R200 (USD 19) and I am sure that a lot more people would be using Linux in South Africa if our Internet fees were lower.

Getting back to the matter at hand, Copy.com comes to the rescue of folks everywhere who want more free space than what Dropbox is willing to offer them.

Go to www.copy.com and create a free account. Here is my referral code: https://copy.com?r=vEWnoM if you like, you can post your code in the comments section and I will try to rotate them from time to time.

To install Copy.com in Linux, you can do it the hard way (on their website you can download the tarball) or check http://www.webupd8.org/2014/06/install-copycom-client-in-ubuntu-or.html for a great tutorial on how to set up everything. I will highlight the important part now:


  • Open a Terminal window (click Menu >> Accessories >> Terminal)
  • Type in:
  • sudo add-apt-repository ppa:paolorotolo/copy
  • Press <ENTER>
  • Type in your sudo password, press <ENTER>
  • Type in:
  • sudo apt-get update
  • press <ENTER>
  • Type in:
  • sudo apt-get install copy
  • Press <ENTER>

If Copy.com does not run automatically after this, click on Menu >> Accessories >> Copy and sign in with your username and password.

The future is definitely in cloud computing, something that Peppermint Linux does very well. For me, being able to use a hybrid OS, where I have LibreOffice downloaded for when I need to work offline as well as all the Cloudy goodness that comes baked into the OS is perfect.

Friday, August 22, 2014

Screensavers on Peppermint 5

I'm back (tomorrow is my birthday, very excited).

I found that Peppermint 5 does not have screen savers - it uses a program called light-locker instead. But what if you prefer having a screen saver? Here is how to do it:

Click Menu >> Accessories >> Terminal
type:
sudo apt purge light-locker light-locker-settings
press <ENTER>
type your sudo password and press <ENTER> again

then type in:
sudo apt install xscreensaver xscreensaver-gl xscreensaver-gl-extra xscreensaver-data-extra
and press <ENTER>
It will install.

Now, let's make it autorun:

Open a Terminal, Menu >> Accessories >> Terminal
Type in:
sudo gedit /etc/xdg/autostart/screensaver.desktop
press <ENTER>, type in your sudo password, press <ENTER>

and then place inside it the following information:

[Desktop Entry]
Name=Screensaver
Type=Application
Exec=xscreensaver -nosplash

Save and close the file.

Choose a screensaver that you like:
To activate go to Menu >> System >> Screensaver

(to make things easier, you can copy and paste commands into the Terminal, after copying you can right click inside Terminal then left click on paste)

Saturday, August 16, 2014

Conky for my desktop

Normally Conky is one of the first things that I install after installing my operating system. I have been using the same script that I used on my netbook for my desktop, although this was not perfect. The netbook only has a 10" monitor, while I am now working on a 17" monitor. Lots more screen space, and with that comes more space to display stuff.

My desktop also does not run on a battery, so I needed to remove that stat. I played around with colours and font sizes, as well I had more space now.

Here is my new conky ====>>>>>>>

And yes, my wifi reception really is 100%, at the present moment my desktop is only 1 meter away from the router, but once my log cabin is finished I will have about 10 meters or so.

Things I added:


  • Date & Time
  • More spaces between sections
  • Made Conky wider than on netbook
  • Connection quality for wifi

And, as always (as I do like to share) here is my Conky script:

background yes
use_xft yes
xftfont Sans:size=8
xftalpha 1
update_interval 1.0
total_run_times 0
own_window yes
own_window_transparent yes
own_window_type normal
own_window_hints undecorated,below,sticky,skip_taskbar,skip_pager
double_buffer yes
minimum_size 250 840
maximum_width 400
draw_shades yes
draw_outline no
draw_borders no
draw_graph_borders yes
default_color green
default_shade_color black
default_outline_color white
alignment top_right
gap_x 12
gap_y 12
no_buffers yes
text_buffer_size 1024
uppercase no
cpu_avg_samples 2
override_utf8_locale no

own_window_argb_value 0
own_window_argb_visual no
own_window_colour 000000
TEXT
${font sans-serif:bold:size=11}${color white}SYSTEM ${hr 2}

${font sans-serif:normal:size=9}${color green}$sysname $kernel $alignr $machine
Host:$alignr$nodename
Uptime:$alignr$uptime

${font sans-serif:bold:size=11}${color white}TIME ${hr 2}

${color green} ${font :size=30}$alignc${time %H:%M:%S}
${voffset -30}${font :bold:size=10}$alignc${time %d %b. %Y}
${font :bold:size=10}$alignc${time %A}

${font sans-serif:bold:size=11}${color white}PROCESSORS ${hr 2}

${font sans-serif:normal:size=9}${color green}${cpugraph cpu1}
CPU1: ${cpu cpu1}% ${cpubar cpu1}
TEMP: ${font sans-serif:bold:size=9}${color red}$alignr $acpitemp


${font sans-serif:bold:size=11}${color white}MEMORY ${hr 2}

${font sans-serif:normal:size=8}${color green}RAM $alignc $mem / $memmax $alignr $memperc%
$membar


${font sans-serif:bold:size=11}DISKS ${hr 2}

${font sans-serif:normal:size=9}/ $alignc ${fs_used /} / ${fs_size /} $alignr ${fs_used_perc /}%
${fs_bar /}
${font sans-serif:normal:size=8}/home $alignc ${fs_used /home} / ${fs_size /home} $alignr ${fs_used_perc /home}%
${fs_bar /home}
SWAP $alignc ${swap} / ${swapmax} $alignr ${swapperc}%
${swapbar}


${font sans-serif:bold:size=11}${color white}TOP PROCESSES ${hr 2}

${font sans-serif:normal:size=9}${color green}${top_mem name 1}${alignr}${top mem 1} %
${top_mem name 2}${alignr}${top mem 2} %
$font${top_mem name 3}${alignr}${top mem 3} %
$font${top_mem name 4}${alignr}${top mem 4} %
$font${top_mem name 5}${alignr}${top mem 5} %


${font sans-serif:bold:size=11}${color white}NETWORK ${hr 2}

${font sans-serif:normal:size=9}${color green}IP address: $alignr ${addr wlan0}
ESSID: $alignr ${wireless_essid wlan0}
${downspeedgraph wlan0}
DLS:${downspeed wlan0} kb/s $alignr total: ${totaldown wlan0}
${upspeedgraph wlan0}
ULS:${upspeed wlan0} kb/s $alignr total: ${totalup wlan0}
Connection quality: $alignr ${wireless_link_qual_perc wlan0}%

Wednesday, August 13, 2014

Sharing files over a network

I have a Windows background, so I am comfortable sharing folders and printers in Windows XP and 7. I have before today, not shared a folder in Linux.

Over the weekend I installed Peppermint 5 on my Pentium 4 desktop. I have had experience with ndswrapper and using Windows wifi drivers in Linux, but more about that later.

**** Warning **** Never share your Home folder with read / write access. Always share a sub folder only. It's not wise to share Home, with any user.

For now I want to walk you through how to share a folder in Peppermint 5. A great feature of Peppermint 5 can be found in Software Manager.

1. Click Menu >> Software Manager

2. Click on Featured. Scroll down to Peppermint-Networking-Pack. Install it. One of the programs it installs is a graphical utility to configure Samba shares, called the Samba Server Configuration Tool. It's great, makes the job very easy.


3. Create a folder that you want to share over the network, open PCManFM, (Menu >> PCManFM) then right click in the white section, left click on create new Folder. Type a name and press <ENTER> , I created a folder called Dumpster in my Home directory.

4. Now click Menu >> System Tools >> Samba


5. Click the + , which is just under the File menu.


6. Click on Browse, then navigate to your folder, click OK. Click the check boxes next to Writable and Visible. Now click the Access tab


7. Now click the dot next to Allow access to everyone.

8. Click OK

9. Go to your folder in PCManFM, click the up arrow (top left), now right click on your shared folder. Left click on Properties. Click the Permissions Tab, make sure that Change content is set to Anyone. Click OK.

And you are done. Very painless indeed.

Sunday, August 10, 2014

Donations roll call

When was the last time that you donated to an open source project? Now, please bear in mind that this is not a paid or sponsored post. This is something that I feel very strongly about.

Open source software (and even the podcasts that you love) have lots of expenses. People work for little or no money, while doing something that they feel very passionate about.

Here is a list of people that you can consider donating to:


  • Your current Linux distro of choice - these guys have huge bills to pay for hosting, not everyone has Redhat's budget here. 
  • LibreOffice / OpenOffice / your office suite of choice - without the hard work these guys do, how would we create and edit our documents, spreadsheets and slideshows? I think it is strange how many people buy Microsoft Office, but would not consider making a $5 donation to a good cause.
  • Any open source apps you enjoy and use regularly. 
Like I said before, this post was not paid for by anyone. I am setting an example here. I've started going through my list and making donations. Remember that every $ helps, and that with our support the good people who make open source software will be able to carry on doing their fantastic work. 

OpenOffice has been downloaded more than 50 million times, can you imagine what would happen if every person who used their software donated $1? Imagine how many full time developers and testers they could employ? Imagine the progress they could make. Now imagine being a part of that change :)


Saturday, August 9, 2014

A sneak peak of what is to come

I've used a lot of different Bible programs over the years. Until recently, I used mainly E-Sword.

Join me as I try to get E-Sword running in WINE and take a look at a few native Linux Bible apps.

Till next time !!!

Wednesday, August 6, 2014

Font management becomes a priority

You can tell a lot about someone based only on the fonts they use. Lots of web pages have been written on the subject (link 1, link 2, link 3), but today I would like to talk to you not about the fonts themselves but rather about font management

In a previous post on fonts I mentioned Fontypython, today I would like to introduce Fontmatrix. It makes installing fonts a piece of cake. Whether you are installing one font or thousands of fonts - the procedure is painless.

Fontmatrix has many other features, but this is merely an introduction. I hope you enjoy this app as much as I have.

Now that you have the right software to view and manage fonts, why not download a few fonts from dafont? They have fonts for every occasion.

Here's a screenshot of me installing my core font set:


Updating Conky for multiple partitions

Of course now that /home is on it's own partition, Conky will no longer display the disk usage correctly.

I did some reading, copied and pasted - then edited a line or two. Here is my updated Conky script:

background yes
use_xft yes
xftfont Sans:size=8
xftalpha 1
update_interval 1.0
total_run_times 0
own_window yes
own_window_transparent yes
own_window_type normal
own_window_hints undecorated,below,sticky,skip_taskbar,skip_pager
double_buffer yes
minimum_size 200 700
maximum_width 400
draw_shades yes
draw_outline no
draw_borders no
draw_graph_borders yes
default_color green
default_shade_color black
default_outline_color white
alignment top_right
gap_x 12
gap_y 12
no_buffers yes
text_buffer_size 1024
uppercase no
cpu_avg_samples 2
override_utf8_locale no

TEXT
${font sans-serif:bold:size=8}SYSTEM ${hr 2}
${font sans-serif:normal:size=8}$sysname $kernel $alignr $machine
Host:$alignr$nodename
Uptime:$alignr$uptime
Battery Status: $alignr$battery

${font sans-serif:bold:size=8}PROCESSORS ${hr 2}
${font sans-serif:normal:size=8}${cpugraph cpu1}
CPU1: ${cpu cpu1}% ${cpubar cpu1}

${font sans-serif:bold:size=8}MEMORY ${hr 2}
${font sans-serif:normal:size=8}RAM $alignc $mem / $memmax $alignr $memperc%
$membar

${font sans-serif:bold:size=8}DISKS ${hr 2}
${font sans-serif:normal:size=8}/ $alignc ${fs_used /} / ${fs_size /} $alignr ${fs_used_perc /}%
${fs_bar /}
${font sans-serif:normal:size=8}/home $alignc ${fs_used /home} / ${fs_size /home} $alignr ${fs_used_perc /home}%
${fs_bar /home}
SWAP $alignc ${swap} / ${swapmax} $alignr ${swapperc}%
${swapbar}

${font sans-serif:bold:size=8}TOP PROCESSES ${hr 2}
${font sans-serif:normal:size=8}${top_mem name 1}${alignr}${top mem 1} %
${top_mem name 2}${alignr}${top mem 2} %
$font${top_mem name 3}${alignr}${top mem 3} %
$font${top_mem name 4}${alignr}${top mem 4} %
$font${top_mem name 5}${alignr}${top mem 5} %

${font sans-serif:bold:size=8}NETWORK ${hr 2}
${font sans-serif:normal:size=8}IP address: $alignr ${addr wlan0}
ESSID: $alignr ${wireless_essid wlan0}
${downspeedgraph wlan0}
DLS:${downspeed wlan0} kb/s $alignr total: ${totaldown wlan0}
${upspeedgraph wlan0}
ULS:${upspeed wlan0} kb/s $alignr total: ${totalup wlan0}


Taking the plunge! Changing my partitions

Partitions are very important, they divide your hard drive into different parts (drives), which may make certain things easier. A little history first - in my experience with Windows, I always have a C: for my Windows installation and Program Files, while D: is for My Documents. In Peppermint, they are / and /home.


I asked the helpful Peppermint Community: http://forum.peppermintos.com/index.php?topic=772.msg6547#msg6547 and a very helpful user game me a link. Which was trustworthy and worked.

I now have 20 GB for /, a little for SWAP and the rest of my 160 GB HDD goes to /home.

Extra reading:

link 1
link 2
link 3

Getting wifi driver on pc to load at startup

Open a terminal Window:

Type:

sudo gedit /etc/modules
when it opens, add a NEW line at the bottom that reads

ndiswrapper

SAVE the file

Sunday, August 3, 2014

Changing desktop icons size

I've got a 10" netbook, and I am not a fan of large desktop icons.

You can customize the size of your icons by opening PCManFM (remember that this program is used to determine how much of your desktop works / looks).

Click on Edit >> Preferences >> click on the Display tab. Then choose your icon size.

I also set my Thumbnail size while I was here.

How to open a folder as Root

With Peppermint 5, PCManFM no longer has the option to open a folder as Root as listed under the Tools menu.

Now you can right click a folder, then click on open as root. See the screenshot.

Tuesday, July 29, 2014

More Conky goodness

To make dealing with Conky easier, open a Terminal window, then copy and paste the following into it (one at a time):

sudo apt-add-repository -y ppa:teejee2008/ppa
sudo apt-get update
sudo apt-get install conky-manager


You now have Conky Manager listed under Accessories in the Menu :) run the program. In the top row of icons, click Open theme folder. Create a text file and paste your conky script of choice in it. This is mine:

background yes
use_xft yes
xftfont Sans:size=8
xftalpha 1
update_interval 1.0
total_run_times 0
own_window yes
own_window_transparent yes
own_window_type normal
own_window_hints undecorated,below,sticky,skip_taskbar,skip_pager
double_buffer yes
minimum_size 200 700
maximum_width 400
draw_shades yes
draw_outline no
draw_borders no
draw_graph_borders yes
default_color green
default_shade_color black
default_outline_color white
alignment top_right
gap_x 12
gap_y 12
no_buffers yes
text_buffer_size 1024
uppercase no
cpu_avg_samples 2
override_utf8_locale no

TEXT

${font sans-serif:bold:size=8}SYSTEM ${hr 2}
${font sans-serif:normal:size=8}$sysname $kernel $alignr $machine
Host:$alignr$nodename
Uptime:$alignr$uptime
Battery Status: $alignr$battery

${font sans-serif:bold:size=8}PROCESSORS ${hr 2}

${font sans-serif:normal:size=8}${cpugraph cpu1}
CPU1: ${cpu cpu1}% ${cpubar cpu1}

${font sans-serif:bold:size=8}MEMORY ${hr 2}

${font sans-serif:normal:size=8}RAM $alignc $mem / $memmax $alignr $memperc%
$membar

${font sans-serif:bold:size=8}DISKS ${hr 2}

${font sans-serif:normal:size=8}/ $alignc ${fs_used /} / ${fs_size /} $alignr ${fs_used_perc /}%
${fs_bar /}
SWAP $alignc ${swap} / ${swapmax} $alignr ${swapperc}%
${swapbar}

${font sans-serif:bold:size=8}TOP PROCESSES ${hr 2}

${font sans-serif:normal:size=8}${top_mem name 1}${alignr}${top mem 1} %
${top_mem name 2}${alignr}${top mem 2} %
$font${top_mem name 3}${alignr}${top mem 3} %
$font${top_mem name 4}${alignr}${top mem 4} %
$font${top_mem name 5}${alignr}${top mem 5} %

${font sans-serif:bold:size=8}NETWORK ${hr 2}

${font sans-serif:normal:size=8}IP address: $alignr ${addr wlan0}
ESSID: $alignr ${wireless_essid wlan0}
${downspeedgraph wlan0}
DLS:${downspeed wlan0} kb/s $alignr total: ${totaldown wlan0}
${upspeedgraph wlan0}

ULS:${upspeed wlan0} kb/s $alignr total: ${totalup wlan0}

Save your text file, then restart the program. There are settings to make Conky autorun and more. A very useful program.

Monday, July 28, 2014

How to make programs autorun

Here is something I found interesting: new method


Dropbox won't finish installing

So, I click Menu >> Internet >> Dropbox to install Dropbox.

It loads up to 100%, but never finishes. Here is how to fix it: (from forum)

Open a Terminal window and type:

sudo apt update
press <ENTER>

enter your super user password, and press <ENTER>
wait

sudo apt upgrade press <ENTER>
wait
sudo apt dist-upgrade
press <ENTER>

wait

reboot

Then try reinstalling Dropbox again, should work.

Peppermint 5 here we go!

So today I finally got around to installing Peppermint 5. I formatted my entire hard drive, so I am no longer dual booting Windows XP (which means that at this point I need to fire up my desktop if I need Coreldraw or my Canon Lide 90 scanner).

I am currently downloading LibreOffice and I still need to set everything up. At least Conky is installed already :)

So, unetbootin helped me (once again) to create a live flash drive, after downloading the Peppermint 5 ISO from www.peppermintos.com This truly is a wonderful little program.

Installation was uneventful, as expected. My Broadcom wifi card still needs proprietary drivers. This means I need to plug into the router when installing, afterwards click on Menu -> Preferences -> Additional drivers. Here you need to enable the wifi driver. Wifi works again, whoop whoop.

While Googling, I found http://www.binarytides.com/better-linux-mint-17-cinnamon/ and I started working my way through the list. Pepperflash is installed by default, which is great. When installing ms-tt-corefonts I had a strange blue window with white text in it. I could not get past this window, so I Googled some more. Finally found a page that said "press TAB, then ENTER", which worked and  was able to complete that installation and load more software.

Conky is back on, (Audacity, Deluge, UGet, VLC and a few others too), I need to install Dropbox next. I have a new approach to Dropbox: I move stuff that I am not actively working on into my OneDrive or Google Drive, this means when I reinstall it does not take as long to sync.

Will post an update as soon as I am ready.

Thursday, July 24, 2014

Where am I now?

I went very quiet after the articles on Peppermint 4's release.

I am now working as a sales consultant at a large computer sales store. I hope to make time to install Peppermint 5 soon and start blogging about that. So far I am still running Peppermint 4, just have not had time to do much about it.

I still can't run Corel Draw in Linux, and my scanner still is not Linux compatible... but some things probably won't change.

I am also downloading the new Linux Mint, which I hope to get to after Peppermint 5.

Wish me luck